Everything you need to know about setting up a home photography studio.
November 14th, 2024
Do you dream of setting up a home photography studio? For many photographers, this major goal opens up numerous opportunities. If you can produce high-quality studio work from home, you can avoid the hassle of transporting large, cumbersome equipment to a rented studio. It also gives you total control over your shooting environment. A home studio setup can help your photography business thrive and elevate your online portfolio to new heights.
Certain types of photography are best suited to a studio environment. If you specialize in portraits or headshots, having a home studio can be a significant advantage. Portrait and headshot photography is a lucrative field with a steady demand—everyone needs good portraits for LinkedIn and other social media profiles. If you’re interested in learning more about portrait photography, check out our complete guide to portrait photography.
A versatile home studio can also accommodate various types of portraiture. Depending on the space available, you can specialize in pet portraits, newborn shoots, engagement sessions, maternity photos, and family portraits. These are all great ways to utilize your home studio and expand your portfolio. So, how do you get started?
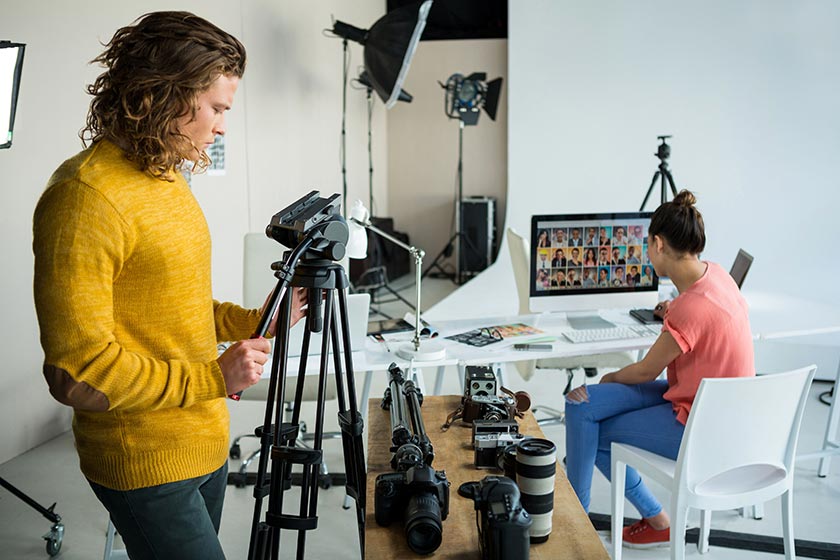
Home photography studio setup.
Define your goals:
Before purchasing any equipment, it’s crucial to clarify your goals for your home studio. Understanding what types of photography you want to focus on will help you avoid unnecessary expenses and ensure your setup meets your needs.
For example, if most of your shoots involve large family photos, a small spare bedroom might not have enough room. You’ll need a larger space or a flexible area that can be easily converted for each shoot. On the other hand, if your focus is on newborn photography, a smaller space would be perfectly sufficient.
Consider your style:
Your personal photographic style should influence your studio setup. If your portfolio features sunny, naturally lit photos, set up your home studio with plenty of natural light—or choose high-quality lighting that replicates For dark and moody images, choose a space where you can control ambient light effectively. The best portrait photography portfolios have a distinct and recognizable photographic voice and style, so it’s important to consider your signature look.
Practical considerations:
The home photography studio should serve you and your business needs, not hold you back! Other things to consider before you begin planning your photography studio setup are electricity and safety. Ensure your chosen space has enough outlets or that you can safely use extension cords without creating tripping hazards. If clients visit your home studio, prioritize safety by managing power cords and ensuring equipment stability.
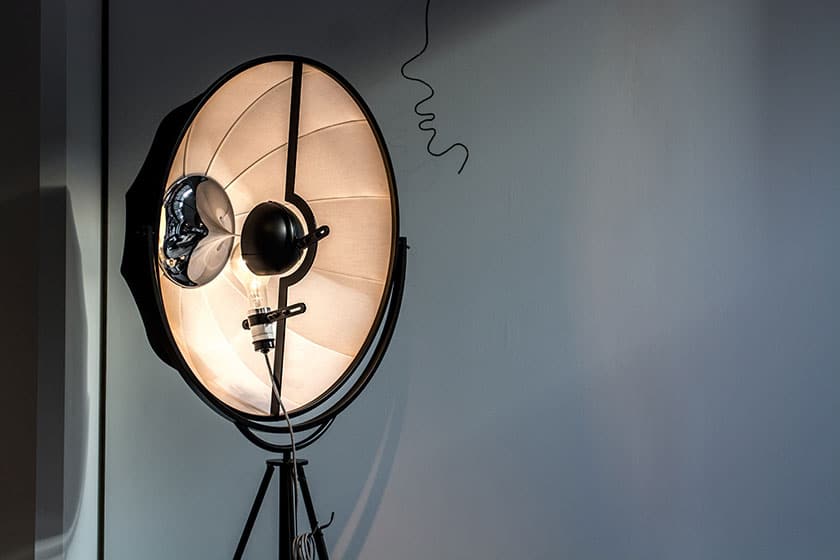
Essential equipment for a home photography studio
Whether you’re looking to create stunning portraits, product photos, or creative art, having the right equipment is crucial.
Camera and lenses:
Camera
- Resolution: High-megapixel cameras provide greater detail, especially useful for large prints. For example, cameras like the Canon EOS R5 or the Nikon Z7 II offer around 45 megapixels, ideal for capturing intricate details.
- Sensor Size: Full-frame sensors typically offer better image quality and superior low-light performance, which is crucial for studio photography where lighting conditions may vary. APS-C and Micro Four Thirds sensors are also viable options, but may not perform as well in low light situations.
- Connectivity: Look for Wi-Fi or tethering options for easy image transfer and remote shooting. This allows for efficient workflow, especially during client shoots, where a quick image review can be beneficial.
Lenses
- 50mm Prime Lens: Great for portraits with a natural perspective. It’s often referred to as the “nifty fifty” because of its versatility and ability to produce images similar to what the human eye sees.
- 85mm Prime Lens: Ideal for headshots, offering beautiful bokeh and subject isolation. This lens is perfect for creating stunning portraits with creamy background blur, enhancing the subject’s prominence.
- 24-70mm Zoom Lens: Versatile for a range of shots, from wide-angle to mid-telephoto. This lens is a workhorse for many photographers, allowing flexibility in framing the subject without the need to change lenses.
Lighting equipment:
Studio lights
- Strobe Lights: Powerful and versatile, great for freezing action and providing consistent light. They come in various power outputs, making them suitable for small and large studios.
- Continuous Lights: Useful for videography and photography, allowing you to see the lighting effect in real time. LED panels are popular for their energy efficiency and adjustable color temperatures.
- Speedlights: Portable, versatile, and inexpensive, ideal for smaller studios or on-location shoots. They can also be used off-camera with triggers, offering greater flexibility for your lighting setup.
Light Modifiers
- Softboxes: Diffuse light for soft, even illumination. They come in various shapes and sizes, such as rectangular, octagonal, and in a strip, each creating different lighting effects.
- Umbrellas: Offer broad, soft light; reflective umbrellas provide more contrast. Shoot-through umbrellas can diffuse light further, creating a softer effect compared to reflective umbrellas.
- Gels: They help change the color of your light sources to add artistic effects.
- Reflectors: Metallic or white reflectors bounce light onto your subject, filling in shadows and adding a warm or cool glow. They are available in different colors (white, silver, gold, and black) to modify the light’s quality and temperature.
Backgrounds and backdrops:
Seamless paper
Seamless paper backdrops are a studio staple, offering clean and professional backgrounds in various colors. They are perfect for portraits, fashion, and product photography. Brands like Savage and Colorama provide a wide range of colors, allowing you to match the backdrop to your creative vision.
Muslin and canvas
Muslin and canvas backdrops provide a more textured and artistic feel. They are reusable and available in a variety of designs and colors. These backdrops are often hand-painted, adding a unique touch to your photos, and can be easily stored and transported.
Background support system
A sturdy background support system is essential to hold your backdrops in place. Look for adjustable stands that can accommodate different sizes and weights. Systems with crossbars that can extend to various widths provide greater flexibility in your studio setup.
Tripods and stands:
Camera tripod
- Adjustable Height: Allows you to shoot from various angles. Tripods with a center column that can tilt and swivel offer even more versatility for creative shots.
- Sturdy Build: To support your camera and lens without wobbling. Carbon fiber tripods are lightweight yet strong, making them easy to transport while maintaining stability.
- Quick Release Plate: For easy mounting and dismounting. Arca-Swiss compatible plates are a popular choice for their universal fit with many tripod heads and accessories.
Light stands and sandbags
Durable light stands are crucial for positioning your lights accurately. Look for stands that are adjustable and can support the weight of your lights and modifiers. Heavy-duty stands with air cushioning prevent sudden drops, protecting your equipment and ensuring safety during adjustments. It is also important to have sandbags for extra security against tipping. Even when indoors and away from windy conditions, some light positions can make a stand unstable–sandbags are a key safety tool and quick to use.
Remote triggers and tethering tools:
Remote triggers
Wireless triggers let you control your lights and camera remotely, allowing hands-free shooting—ideal for self-portraits or minimizing camera shake. Brands like PocketWizard and Godox offer reliable triggers with long-range capabilities and multiple channel options to avoid interference.
Tethering tools
Tethering your camera to a computer or tablet helps to view images on a larger screen in real time, making it easier to assess and adjust your shots. Software like Adobe Lightroom and Capture One offer excellent tethering capabilities. Tether Tools provides high-quality cables and accessories designed specifically for stable and efficient tethering setups.
Props and accessories:
Props
Props add creativity and context to your shoots. Consider items that suit your photography style, such as chairs, stools, fabrics, and small objects relevant to your subjects. For example, vintage items can add a nostalgic feel, while modern props can create a contemporary look.
Accessories
- Light Meters: They are best for precise exposure settings. Sekonic is a trusted brand offering a range of meters for different needs, from simple incident light meters to advanced models with flash metering capabilities.
- Color Checkers: To ensure accurate color representation. The X-Rite ColorChecker Passport helps to achieve consistent color balance and exposure in post-processing.
- Gaffer Tape: For securing cables and equipment safely. Unlike duct tape, gaffer tape leaves no residue and is easy to remove, making it perfect for temporary setups.
Turn your images into income.
Sell your photos online from your own custom store. Set up is quick and your clients will enjoy a seamless shopping experience.
Post-processing tools:
Computer and software
A powerful computer with sufficient RAM and storage is essential for post-processing high-resolution images. Popular editing software includes:
- Adobe Photoshop: This is best known for advanced editing and retouching. Its extensive range of tools and plugins makes it a top choice among professional photographers for detailed editing
- Adobe Lightroom: One of the most used tools for organizing, editing, and sharing photos. Lightroom’s reversible editing and powerful cataloging features make it indispensable for managing large photo libraries.
- Capture One: Known for superior color grading and tethering capabilities. Many professionals prefer Capture One for its advanced RAW processing and customizable interface.
Monitor calibration
Ensure your monitor displays colors accurately by using a calibration tool. This is crucial for achieving consistent and professional results. Tools like the X-Rite i1Display Pro or Datacolor SpyderX guarantee your monitor’s colors are true to life, helping you produce prints that match your digital edits.
Home photography studio kits:
When you’re looking to set up a home studio quickly and efficiently, purchasing a photography studio kit can be a game-changer. These kits typically include essential equipment like lights, stands, backdrops, and sometimes even accessories like reflectors and softboxes. While buying individual items can make it easier to customize with the exact brands you want, purchasing kits can lead to great savings. Kits may have lesser known brands and occasional lower quality items compared to individual pieces, but they are a great option for someone just starting out or on a tight budget. Here’s a look at some popular home photography studio kits currently available and what they offer.
1. Neewer 800W 5500K Photography Softbox Lighting Kit
The Neewer 800W 5500K Photography Softbox Lighting Kit is a fantastic option for beginners and semi-professionals. This kit includes:
- 2 Softboxes: 20”x28” softboxes with E27 sockets, providing soft and even lighting.
- 4 Light Bulbs: 45W bulbs offering a 5500K color temperature, simulating natural daylight.
- 2 Light Stands: Adjustable light stands that extend up to 6.5 feet.
- 1 Carrying Bag: For easy transportation and storage.
The Neewer kit is known for its affordability and ease of use, making it a popular choice for portrait and product photographers working from home.
2. LimoStudio 700W Photography Studio Lighting Kit
The LimoStudio 700W Photography Studio Lighting Kit is another excellent choice for home studios, offering:
- 3 Light Stands: Two 86” and one 28” mini stand for various lighting positions.
- 3 Umbrellas: Two white and one silver, providing soft light and enhancing contrast.
- 3 Light Bulbs: 45W CFL bulbs with a daylight-balanced color temperature.
- 2 Muslin Backdrops: Black and white, with a support system for seamless setup.
- 1 Background Support System: Adjustable to accommodate different backdrop sizes.
This LimoStudio kit is ideal for photographers who need a reliable and straightforward lighting setup, along with basic backdrops for portrait and product photography.
3. Godox E300 Studio Strobe Lighting Kit
For those looking for more advanced lighting options, the Godox E300 Studio Strobe Lighting Kit is an excellent investment. This kit includes:
- 2 E300 Strobes: 300W strobe lights with adjustable power output, perfect for high-quality studio lighting.
- 2 Softboxes: 60x60cm softboxes for soft, diffused light.
- 2 Light Stands: Adjustable stands reaching up to 2 meters.
- 1 Trigger Set: For wireless control of your strobes.
- 1 Carrying Bag: Durable and padded for protection during transport.
The Godox E300 kit is highly regarded for its powerful strobe lights and comprehensive control options, making it suitable for more experienced photographers who require precise and powerful lighting.
4. Mountdog Softbox Lighting Kit
The Mountdog Softbox Lighting Kit offers a great balance between affordability and functionality. This kit features:
- 2 Softboxes: 20”x28” with E27 sockets, providing consistent soft light.
- 2 LED Bulbs: 95W LED bulbs with adjustable brightness and a 5500K colour temperature.
- 2 Light Stands: Extendable up to 6.5 feet.
- 1 Remote Control: For easy brightness adjustment.
Mountdog’s kit is appreciated for its energy-efficient LED bulbs and remote control, making it a user-friendly option for home studio setups.
Setting up a home photography studio on a budget.
Setting up a home photography studio doesn’t have to be an expensive endeavor. If home photography studio kits don’t meet your specific needs, there are many ways to create a high-quality setup without breaking the bank. Here are some tips and strategies to help you build an effective and budget-friendly home studio.
Embrace second-hand and refurbished gear.
One of the best ways to save money is by purchasing second-hand equipment. High-quality cameras, lenses, and lighting can be found at a fraction of the cost when bought used. Mak sure to buy from trusted sources, such as reputable online retailers, photography stores, or local sellers with good reviews. Often, these sources offer warranties or return policies, providing additional peace of mind.
Refurbished options are another excellent way to avoid paying full price. Many retailers and manufacturers offer refurbished products that have been thoroughly tested and certified to work like new. These items often come with warranties and are significantly cheaper than brand-new gear. Checking online marketplaces and local retailers for refurbished deals can yield substantial savings on essential studio equipment.
Get creative with DIY solutions.
The internet is a treasure trove of DIY photography hacks that can help you save money while still achieving professional results. For instance, you can create your own reflectors using inexpensive materials like foam boards or aluminum foil-covered cardboard. These DIY reflectors can effectively bounce and diffuse light, enhancing the quality of your photos without the need for costly equipment.
Other DIY projects can include building light stands, backdrops, backdrop supports, and even softboxes. You can find countless tutorials online that explain step-by-step how to create these items using inexpensive materials. By embracing DIY solutions, you can significantly cut costs while customizing your studio to fit your specific needs.
Utilize natural light.
Natural light is incredibly powerful and can create breathtaking results, particularly in portrait photography. If you have access to a space with ample daylight, take advantage of it. Position your subjects near windows to utilize the soft, diffused lighting that natural light provides. This approach can eliminate the need for expensive studio lights, reducing your overall setup costs.
To further enhance natural light, consider using DIY light modifiers such as sheer curtains to diffuse harsh sunlight or white foam boards to reflect light and fill in shadows. These simple modifications can help you control and shape the light, giving your photos a professional look without the expense of artificial lighting.
Smart shopping tips.
- Watch for sales: Keep an eye out for sales events like Black Friday, Cyber Monday, and Amazon Prime Day for discounts on photography equipment.
- Join photography communities: Online forums and local photography clubs often have buy/sell sections where you can find affordable, pre-owned gear.
- Set priorities: Start with the most crucial items and gradually expand your setup as your budget allows. You may not need every tool right away–or ever, depending on what you photograph. Starting with the basics allows you the wiggle room to spend your budget where you need it most.
Small home photography studio tips.
Make the most of a small space.
If your available space is extra tiny, don’t despair! With the right setup, even the smallest spaces can become a perfectly adequate photo studio. Here are a few useful tips to help you make the most of your compact home studio:
- Minimize extra lights: Keep additional lights to a minimum. Utilize window light whenever possible to avoid crowding your space with light stands. Position your subject near windows to maximize natural light, which can often provide a beautiful, soft illumination.
- Use light modifiers: Light modifiers, especially reflectors, can work wonders in small spaces. A couple of reflectors can make your portraits look fully lit, simulating a three-point lighting setup. Experiment with different reflector placements to bounce available light and achieve the best results in your confined area.
- Choose the right portrait lens: In a small space, a wider lens is a more practical choice for the space. A high-quality prime lens can allow you to capture your subject effectively within the limited distance available, or a zoom lens in the 24-70 range can help you “step back” even when you physically can’t. Think about how focal length influences both framing and the appearance of your subject. Generally, a 35mm lens is the widest you should go for portraits in tight spaces to avoid noticeable distortion, so be thoughtful of your focal choices when opting for a zoom lens. Research and choose a lens that suits your style and the look you want to achieve.

Setting up a home photography studio on a budget.
Setting up a home photography studio doesn’t have to be an expensive endeavor. If home photography studio kits don’t meet your specific needs, there are many ways to create a high-quality setup without breaking the bank. Here are some tips and strategies to help you build an effective and budget-friendly home studio.
Embrace second-hand and refurbished gear.
One of the best ways to save money is by purchasing second-hand equipment. High-quality cameras, lenses, and lighting can be found at a fraction of the cost when bought used. Make sure to buy from trusted sources, such as reputable online retailers, photography stores, or local sellers with good reviews. Often, these sources offer warranties or return policies, providing additional peace of mind.
Refurbished options are another excellent way to avoid paying full price. Many retailers and manufacturers offer refurbished products that have been thoroughly tested and certified to work like new. These items often come with warranties and are significantly cheaper than brand-new gear. Checking online marketplaces and local retailers for refurbished deals can yield substantial savings on essential studio equipment.
Get creative with DIY solutions.
The internet is a treasure trove of DIY photography hacks that can help you save money while still achieving professional results. For instance, you can create your own reflectors using inexpensive materials like foam boards or aluminum foil-covered cardboard. These DIY reflectors can effectively bounce and diffuse light, enhancing the quality of your photos without the need for costly equipment.
Other DIY projects can include building light stands, backdrops, backdrop supports, and even softboxes. You can find countless tutorials online that explain step-by-step how to create these items using inexpensive materials. By embracing DIY solutions, you can significantly cut costs while customizing your studio to fit your specific needs.
Utilize natural light.
Natural light is incredibly powerful and can create breathtaking results, particularly in portrait photography. If you have access to a space with ample daylight, take advantage of it. Position your subjects near windows to utilize the soft, diffused lighting that natural light provides. This approach can eliminate the need for expensive studio lights, reducing your overall setup costs.
To further enhance natural light, consider using DIY light modifiers such as sheer curtains to diffuse harsh sunlight or white foam boards to reflect light and fill in shadows. These simple modifications can help you control and shape the light, giving your photos a professional look without the expense of artificial lighting.
Smart shopping tips.
- Watch for sales: Keep an eye out for sales events like Black Friday, Cyber Monday, and Amazon Prime Day for discounts on photography equipment.
- Join photography communities: Online forums and local photography clubs often have buy/sell sections where you can find affordable, pre-owned gear.
- Set priorities: Start with the most crucial items and gradually expand your setup as your budget allows. You may not need every tool right away–or ever, depending on what you photograph. Starting with the basics allows you the wiggle room to spend your budget where you need it most.
Small home photography studio tips.
Make the most of a small space.
If your available space is extra tiny, don’t despair! With the right setup, even the smallest spaces can become a perfectly adequate photo studio. Here are a few useful tips to help you make the most of your compact home studio:
- Minimize extra lights: Keep additional lights to a minimum. Utilize window light whenever possible to avoid crowding your space with light stands. Position your subject near windows to maximize natural light, which can often provide a beautiful, soft illumination.
- Use light modifiers: Light modifiers, especially reflectors, can work wonders in small spaces. A couple of reflectors can make your portraits look fully lit, simulating a three-point lighting setup. Experiment with different reflector placements to bounce available light and achieve the best results in your confined area.
- Choose the right portrait lens: In a small space, a wider lens is a more practical choice for the space. A high-quality prime lens can allow you to capture your subject effectively within the limited distance available, or a zoom lens in the 24-70 range can help you “step back” even when you physically can’t. Think about how focal length influences both framing and the appearance of your subject. Generally, a 35mm lens is the widest you should go for portraits in tight spaces to avoid noticeable distortion, so be thoughtful of your focal choices when opting for a zoom lens. Research and choose a lens that suits your style and the look you want to achieve.
One place for everything from proofing to selling.
Share and sell your photos directly from mobile-friendly, interactive online galleries designed to impress your clients.
