Portrait Photography Tips
Portrait photography is, at its core, about capturing something essential about your subject or universal to all humans, like an emotion, a mood, or an aspect of personality or the human condition. It’s also about capturing the beauty of the human face, in all its varied manifestations. It can range from utilitarian and professional to creative and even abstract.
As is the case with all kinds of photography, the best teacher is practice. But before you start, it helps to have some knowledge under your belt to guide your exploration. That’s what you’ll find in these portrait photography tips: a ton of helpful information, along with answers to questions you’ve probably asked yourself about portrait photography.
14-day free trial. No credit card required.
Introduction: Basics of Portrait Photography
Before you get behind the camera, it’s helpful to know some basic terms and concepts, and to have an idea of how to get started. Rules are frequently meant to be broken in photography, but before you can break them it’s helpful to know what they are. Here are some must-know basics of portrait photography about elements like location, lighting, and settings that every portrait photographer should understand.
Portrait Photography Locations
Portraits can be taken just about anywhere as long as you have sufficient lighting and room. When you’re getting started, shooting by a window or outdoors in natural light is flattering and doesn’t require fancy lighting equipment. Outside look for non-distracting backgrounds like leaves, brick walls, or nice landscapes. If shooting in a studio, white or black backdrops are ideal for learning, but dont be afraid to add in splashes of color or texture.
Portrait Photography Lighting
As a general rule, soft light is more flattering than hard light. Hard light, like what you see at noon on a bright day, can cast unflattering harsh shadows on the face and emphasize imperfections. Conversely, soft light, like what you get from an overcast sky or from a softbox in a studio, will be much more flattering. You can soften shadows by using a reflector or bounce card to bounce light from your main source back onto the subject. There are a lot of lighting priciples for portrait photography, and a lot of them are based in classical fine art. Although a lot of them can get complex, its a good idea to familiarize yourself with the general lighting concepts.
Portrait Photography Poses
Having a good repertoire of portrait photography poses to refer to when directing your subjects can go a very long way in helping you achieve professional results and ensuring your subjects love the images you take of them. Portrait photography poses help people look more natural and at ease in photos. You can, of course, also get creative with your poses for artistic effect. As with the lighting concepts discussed above, there are a lot of options and types of poses. Having a handful of go-to poses is a good place to get you started and you can experient further as you get more comfortable with your photography.
Camera Settings
Portrait photography camera settings include ISO, aperture, and shutter speed. Your ISO should be your camera’s base setting, usually 100. ISO controls your camera’s sensitivity to light so if it’s dark you may have to bup this up a little to make sure your shutter speed is fast enough to avoid camera shake. Aperture will depend on the look you’re going for, with a lower (wider) aperture around f/1.4 creating a flattering blurry background and higher apertures putting more of the frame in focus. Once ISO and aperture are set, you can choose the shutter speed that results in the best exposure for your photo.
Lenses
The best lenses for portrait photography typically have a focal length between 50mm and 85mm. If you go for a wider lens, like a 35 mm lens, you’ll capture more space on either side of your subject, which can be good if you want your portraits to be contextualized. Zoom lenses let you switch focal lengths more easily, which can be desirable, but portrait photographers almost always prefer fixed lenses because they are typically sharper and you can achieve a beautiful shallow depth of field.
Improving as a Portrait Photographer
Getting better is all about challenging yourself to be creative with every shoot. Don’t just do what worked well last time: explore different lighting scenarios, backgrounds, and poses, or try incorporating other elements you can play around with such as unexpected angles. Push yourself to try at least one new, pose, technique, or perspective each time you shoot. Before you know it these experiments will become second nature.
Portrait Photography Poses
Unless you’re shooting professional models, it’s not uncommon for your subjects to need some guidance in terms of their portrait photography poses. Even people who are comfortable in front of a camera may need help finding poses that look natural and flattering on camera. Having some go-to poses you can recommend will help your shoots go smoothly.
Male Portrait Photography Poses
When trying out different male portrait photography poses, think about what you want the portrait to convey in terms of the general mood of the image. Here are some ideas you’ll use again and again:
- Clasping hands together. People often feel awkward about what to do with their hands in photos, so this can be a great pose to start your session.
- Squatting. Sure, this may not be a traditional portrait pose, but it can convey instant cool making it perfect for fashion shoots
- Leaning against a wall. This can work for professional shots, like LinkedIn portraits, but is also great for more casual portraits.
- Sitting on stairs. The platforms at different heights make for great, natural portraits, and your subject can play around with different seated poses.
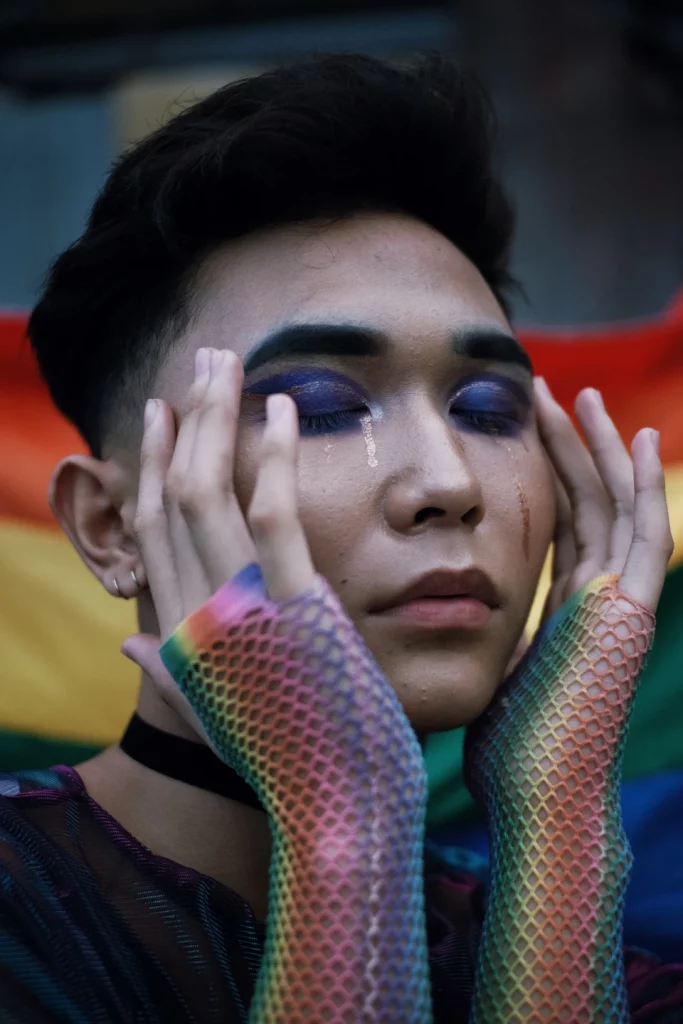
- Touching the face. Whether your subject is stroking his beard or just playing around with covering part of his face, the results can be interesting and flattering.
- Seated in a backward chair. This one feels comfortable for most people, and makes for a fun, playful vibe.
- Deep in thought. The classic thinker—head propped in a cupped hand and gazing into the distance—is perfect for more contemplative portraits.
- Walking. Let your subject walk toward the camera as you shoot in burst mode, and you’re sure to get some good frames.
Photography Self-Portrait Poses
The ubiquitous selfie can be elevated with the right repertoire of self-portrait photogrpahy poses. Try these next time you’re experimenting with solo portraiture.
- Shoot in profile. Turn to the side and play around by gazing at different heights to see which resulting shot is most flattering.
- Mirror shots. Capturing self-portraits in a mirror enables you to see your pose in the reflection, giving you more control over the final image.
- Through a water glass. Hold a glass or vase filled with water between your face and the lens, partially obscuring your face. The result will be unexpected and artsy.
- Ultra closeup. Whether you want to focus on a single feature or fill the frame from edge to edge with your face, closeups can be particularly intimate.
- From below. Place your camera low to the ground angled upward, and experiment with shooting from a dramatic angle.
- Shoot through different materials. Try shooting through sheer curtains, gauze, or a lens filter smeared with vaseline. This will produce a dreamy soft-focus effect.
- Slow down the shutter. With a slower shutter speed and some quick motions, you’ll be able to capture interesting motion blur effects.
- Hands forward. Reach out toward the lens and pose your hands in different positions between your face and lens for a creative image.
Female Portrait Photography Poses
Portrait photography poses females can vary from soft and delicate to bold and fierce. Try these ideas on your next shoot.
- One leg in front of the other. This elongating pose is flattering and easy for anyone to do, even those without experience in front of the camera.
- Gazing upward. Have your subject angle their chin downward and shoot from slightly above eye level for a dramatic, moody image.
- Looking back. Shoot from behind your subject and have her gaze back at you. This is an intriguing pose that can feel unexpected.
- Hand on the shoulder. Hands are very important in portraiture, and a beautiful, feminine pose to experiment with is having your subject rest her hands on her shoulder.
- Touching face. Another way to incorporate hands into a portrait is by having your subject touch her face. This can be sensual or playful, depending on the expression.
- Leaning on hand. Have your subject sit at a table and rest her chin in her hand for a portrait that feels familiar and candid.
- Comfortably reclined. For a casual portrait, have your subject sit in a comfortable chair or couch and lean back, perhaps with an arm over the back of the seat.
- Hands in pockets. This works especially well with a jacket since it looks natural. The result is a cool, relaxed portrait.
Group Portrait Photography Poses
Group portraits can be tricky because you need to make sure everyone in the photo looks good at once. These group portrait photography tips will help you ace your group shots.
- Stagger your subjects. By having the group seated or standing at different heights, your image will have more visual interest.
- Walking together. Having everyone walk toward the lens is a good way to capture shots where no one looks awkward.
- Arms to the side. Sometimes people will naturally cross their arms, but this can make them look tense in images. Have the group put their hands to their sides.
- Centre of attention. Have everyone in the shot focus on something in common. For family photos, babies or little kids work well for this.
- Bend a limb. Ask everyone in the shot to bend an arm or leg slightly. The result will be a natural, relaxed group shot.
- M shape. If you’re shooting a group of 5, pose your subjects so that a line drawn from one face to the next would make an M.
- TIghtly packed. For group photos, people will likely need to stand closer together than they naturally do. Pack your subjects together closely for a great group shot, especially if you have lots of people in it.
- Crack a joke. Everyone looks great with a natural smile, and there’s no better way to capture one than when they’re genuinely laughing.
Portrait Photography Lighting Setup
Photography is fundamentally about understanding light, how to manipulate it, and how to capture it. Knowing how to light a portrait is essential if you want great results, so let’s go over 6 must-know portrait photography lighting setups that will help you create professional, portfolio-worthy portraits.
Split Light
If you want to evoke drama with your portrait, the split light setup is a good choice. Split lighting refers to portraits where half the subject’s face is illuminated and the other half is in shadow. This can be subtle or dramatic, with the dark almost entirely black. Often, the subject will be looking forward, but they can also be facing the illuminated side of the frame. As dramatic as this lighting setup can be, it’s also quite easy. Just place your light source to the side of your subject, at a 90-degree angle from the camera. Try placing it just behind your subject so the dark side doesn’t get any light cast on it.
Rembrandt Light
Named after the Dutch master’s lighting techniques in his paintings, Rembrandt’s lighting has a cinematic look. It can be considered a softer version of split lighting because one side is more illuminated than the other. The lighting source gets positioned to hit the subject at about a 45-degree angle from one side, and the effect can be made more dramatic by moving the light closer to the subject. You can also place a reflector on the other side of your subject, directly opposite the light source, to fill some of the shadows on the darker side of the image.
Loop Light
Loop lighting uses the same 45-degree lighting setup as Rembrandt lighting, but with the light source at a slight elevation. This changes how the shadowss on your subject’s face look. This is a very flattering lighting setup and is characterized by a dark loop-shaped shadow under the nose on the darker side. You should also get a very defined shadow under the subject’s jaw.
Broad Light
Broad lighting involves placing your light source at a 45-degree angle from your subject, then having the subject face about 45 degrees away from the light source. From the perspective of your lens, the part of the subject’s face that’s facing the camera will be nicely illuminated, while the side that’s turned away from the camera will be in shadow. This can make for a bright, cheerful photo, and is also commonly used for child and baby portraiture.
Paramount Light
Paramount lighting is also sometimes called butterfly lighting because of the butterfly-shaped shadow that gets cast under the subject’s nose. This technique involves having your subject face toward the camera, then placing a light source about one foot above and three feet away from them from the direction in which they’re facing. This is a great lighting setup for making cheekbones look high and softening wrinkles.
Natural Light Portrait Photography
As fun and interesting as it is to experiment with studio lighting, natural light portraiture will never go out of style. A lot of the setups we discussed here can be done with natural light by using a window as your light source and placing your subject accordingly. Shooting outdoors in natural light can also produce many varied results, depending on the time of day and lighting conditions when you shoot.
Frequently Asked Questions
When it comes to learning a new skill like portrait photography, it’s not unusual to feel like you have more questions than answers when you’re starting. Here are some of the most common questions new photographers have.
What is the primary light source used in portrait photography?
Many portrait photographers use natural light and shoot outdoors. Two favorite outdoor situations are golden hour, which is the hour after sunrise or the hour before sunset, or overcast skies for the soft, even lighting they provide.
Those who favor indoor studio portrait photography typically use either a strobe light or continuous light as the primary light source. Strobe lights flash when you press the shutter and tend to be stronger, while continuous lights may be less bright but stay lit continuously so you can see how the light is falling on your subject.
What is an advantage of portrait orientation for portrait photography?
When photographing only one or two subjects, using portrait orientation allows you to easily fit the subject’s entire body without additional distractions. You can also shoot closer and focus on details or the connection between a couple, filling the frame while avoiding awkward body cropping. Landscape orientation can be used to advantage when photographing larger family groups, using negative space to draw eyes to your subject, or for jaw-dropping shoot locations that enhance the portrait and tell the story. Shooting with a mix of both orientations will give you the best variety when delivering final client galleries.
What is the best shutter speed for portrait photography?
There is no perfect shutter speed because the right choice will depend on your ISO and aperture setting, and lighting conditions. Keep in mind the faster your shutter speed the more you freeze motion, a.k.a. clearer images. In lower light situations, a fast shutter speed might mean pushing your ISO higher, which can result in more noise. There’s always a trade-off when setting your exposure; the more you practice, the better you’ll understand how each element works together to create your desired image.
Where to place lights for portrait photography?
If you’re just starting out with portrait photography, try mastering the basics before experimenting with more complicated lighting setups. Rembrandt light, loop light, and broad light are all easy to set up and can make for very professional-looking portraits.
How to set up lights for portrait?
When setting up your portrait lights, start by setting them up at about eye level to see how the shadows fall on your subject’s face. Then, you can experiment with placing them at a higher angle. Everyone’s face is unique, so it’s always worth playing around with your positioning a little bit to see what works best for your subject.
What settings for portrait photography?
For the clearest image possible, set your ISO as low as you can in your camera. For many cameras, that will mean ISO 100. Then, if you want a blurry background, try a wide aperture around f/1.4 or whatever is the widest option with your lens. You can use a smaller aperture if you want the whole frame in focus. Finally, choose the shutter speed that gives you a well-exposed photo for your lighting conditions and locations, ISO, and aperture.
How to eliminate shadows in portrait photography?
Light modifiers can help you control the lighting in your image so that more of it falls on the shadows on your subject’s face. Reflectors are great to have on hand. These are large pieces of fabric that reflect a lot of light, and they can be white, silver, or gold. The metallic ones will change the color of the light, giving you a cooler or warmer reflection.
What is the best focal length for portrait photography?
Any lenses with a focal length ranging from 35 mm to 85 mm are suitable for portrait photography, but it’s possible to shoot portraits with both wider lenses and more telephoto lenses. 85 mm is considered a perfect focal length for portraits because it doesn’t distort features at all and looks very similar to what we see with our naked eyes, but unlike 35 mm and 50 mm lenses, they’re less practical to have because the longer focal length limits the number of scenarios you can use them for.
What’s the best way to sell holiday greeting cards to my clients?
Sell greeting cards to clients directly from your gallery store by creating designs ahead of the season and building them as templates in NextZen’s Product Builder. You can use the preset templates from our design team or add image and text placeholders to create your own. Clients can personalize cards with their favorite photos and a message before ordering, and the integrated lab will take care of the printing and shipping.
Build an online portfolio website you love
Put your portrait photography in the spotlight.