Photography tips every aspiring product photographer needs to know.
For many e-commerce businesses, images play an extremely important role in getting people to click on their products and buy them. If your product photos aren’t eye-catching and make the viewer interested enough to click on them, you’re going to have a harder time getting sales and making money through your business.
Luckily, there are plenty of ways you can learn how to make great product photos with some helpful tips.
14-day free trial. No credit card required.

How to do product photography – step by step.
When you’re learning how to do product photography, it always helps to have a step-by-step guide to carefully navigate through the process.
1. Pre-plan your shot list.
If you don’t have a product photography shot list, your photos will lack direction and context. A shot list helps you ensure that you’re capturing everything that needs to be captured and leaving out anything that doesn’t need to be there.
Without a clear idea of what your shots are about, you could end up with miscellaneous product shots that don’t contain enough detail to even be useful.
Hot tip: Make sure you check off each item on your product photography shot list as soon as you shoot it – you don’t want to forget anything. It’s also helpful to have an assistant on set with you to help coordinate and keep track of what items have been captured, and what’s still pending.
2. Choose your background.
While there are a variety of backgrounds on which to set a product, along with many different ways of staging it, there will the times when you don’t have much choice in terms of your background.
When you’re working in product photography you will need to get creative with how you set up a scene, and this includes the background. Consider having a selection of colored poster boards, foam core, patterned or texture surfaces, and seamless roll paper. As you build up your roster of work you will find that having a variety of options will serve you well.
There will be situations where you’re photographing on location so you will need to be able to bring in elements that enhance the location or find ways to get creative with what’s available.
3. Compose the scene.
Product photography composition is the next step in learning how to do product photography. Plan ahead and compose your product photography scene in a way that makes sense.
Also, consider where your scene will take place. If you have any sunlight streaming through a window, use it. Capture beautiful backlit shots by setting up one light behind your product at 45 degrees and slightly above your product, and another in front to fill in the shadows.
Consider the shapes of the product you’re photographing. How is it interacting with the scene? Do you need to make more use of the negative space? Is the way the scene is setup keeping the viewer engaged and focused on the product, or does it cause their eye to wander and leave the frame?
Setup and position lighting: Lighting is one of the most important factors in product photography, and it can make or break your photo. One way to get excellent lighting is by positioning your product photography lights at different angles.
If you have a backlit area (lots of light coming from behind your product), move a light next to it to create a rim light effect. Alternatively, you could use a reflector in front of your product photography lights to bounce more light onto your object.
Double-check your camera settings: There are a variety of factors that determine how well your photos will turn out, but make sure your camera settings match those of your ideal product shot before you start snapping away.
Camera settings will depend on the look you’re trying to achieve, but here are some common settings you might find yourself using when photographing products. The aperture (f-stop) and shutter speed should generally be set to at least f/4 and 1/200 second, respectively. The aperture setting (which controls how much of your image is in focus) is somewhat dependent upon the size of the product, the number of products in an image, and the needs of your client.
The ISO setting determines how sensitive your camera sensor is and the higher it is, the less light is required. But the higher you push your ISO the more noise you’ll have in your images. We recommend keeping your ISO as low as possible and work with the output of your studio lights to ensure the proper exposure.
Shoot your angles: Using the right product photography angles is required to get just the right shot. Where does your subject sit in relation to your camera? Is it facing straight at you or turning toward something else?
The more thought that goes into where things are going to sit relative to each other, the better off you’ll be when it comes time to shoot.
Move on to post-processing: Product photography post-processing can be complex and involved. After all, you’re trying to portray these items in the absolute best way possible. That means adjusting exposure, toning, removing dust and blemishes, color toning, reducing reflections, and more. Retouching is a practice in its own right and many photographers will outsource this stage.
As you learn more about lighting, editing, and cropping, your products will look even better. No one ever sees you retouching your images; they just see how great they look.
If you have no idea where to start with product photography, try shooting products with an umbrella (or other diffused light source) and then editing them in Photoshop or Lightroom to create softer shadows.
How to get into product photography.
Product photography takes a lot of practice to get right, but it’s worth it if you want your store or products to look professional.
Here are some tips to help you get started:
1. Learn the basics.
When you’re first getting into product photography, take it slow. Consider signing up for a photography course, watching Youtube tutorials on specific techniques, or reading books on photography. If you’re an artist but not a photographer, consider taking a few classes on how to communicate your vision with a camera and lighting.
2. Purchase a camera.
This is probably the most obvious piece of equipment that you’ll need. If you’re just starting you don’t need the latest and greatest gear to start shooting products. The same concepts of light composition and styling apply whether youre using and DSRL, a point-and-shoot camera, or your phone. That being said, as you get more serious with your photography you’ll likely find you need a camera that can keep up with the demands of a professional practice like product photography.
3. Practice, then practice more.
Practice your craft by taking photos of things that inspire you (or at least have some artistic merit). No one becomes a professional product photographer overnight, so don’t get discouraged if your photos aren’t turning out like your favorite photographers on social media. They have honed their skills through years of practice, and experience, and sometimes by grinding to get where they are.
Don’t compare where you are in your practice with someone else’s progress. Keep Ira Glass’ well-known advice in mind, and remember that it is normal to have a long stretch while you are learning that your taste exceeds the quality of your work. Continue to put in the work and you’ll get there!
4. Create a portfolio.
A great way to get into product photography is by taking photos of products that you already own. That way, you’ll have something to shoot for your portfolio website and any other online sites where you want to show off your work.
Once you have a bit of a portfolio built up make sure you have somewhere to host and showcase your images. Having a portfolio website is key to your development and success as a commercial photographer.
5. Start marketing.
Once you think you’ve developed a strong grasp on the basics of product photography, it’s time to start marketing your product photography services.
Many photographers start on a freelance basis and begin working their way up slowly and steadily. Marketing yourself can be done through social media platforms like Facebook and Instagram.
Product photography lights and lighting.
One of the most important aspects of good product photography is lighting, and there are several lighting methods that you can use to achieve the perfect shot.
1. Ring light product photography.
If you’re not ready to invest in a full studio, you can create very professional-looking images with just one ring light. You can find ring lights for as little as $10 or as expensive as $200. Ring lights provide a much-needed brightness boost on the front of your subject and create a flattering, even light that will make your images pop.
2. Flash product photography.
Light is key when it comes to product photography, especially flash product photography. Flash is a way to easily control your light and get consistent results. We’re huge fans of natural light, but sometimes flash is the way to go. Familiarize yourself with various lighting setups with flash. You can use a simple 1-light setup angled at 45 degrees to your subject, or you can get more complex and make 3 or 4-point lighting setups. You can get really dialed into how you’re lighting your subject.
3. Product photography lightbox.
A product photography light box is also commonly referred to as a light tent or white box. This is an empty box with a white backdrop and white sides. After you put your product in the lightbox, you’ll notice a difference in the quality of your lighting. The box is typically made of a translucent material so that you can shine your flash through the walls to get even lighting.
4. Light table for product photography.
A light table is a tool that can be used for product photography. It provides a nice surface on which to photograph items, as well as a soft, even light source.
A key advantage of using a light table is that it allows you to change your setup without rearranging your space. You simply have to switch out your product and camera instead.
5. Natural light product photography.
Most product photography setups use flash since it gives you more control, which is key with product photography – especially when you’re photographing a collection of 50 products, for example. That being said, sometimes natural light is a better choice. It may be that the product or your client wants a softer, more organic feel to the images. If this is the case you’ll need to find a way to harness the power of natural light. It’s best to set up your scene near a window or skylight and then use light modifiers like reflectors to craft the light to your needs.
6. One light product photography.
One-light photography is when you use one light to illuminate your subject.
The key to one-light photography is to keep it simple. One of the most common ways to do this is with a flash. Depending on where you place your light source you can drastically change the look and mood of the image. The closer your light is to your subject the more contrast and harsher the shadows. If you place your light source farther away your shadows will feel softer. Play with side lighting, back lighting, or lighting from above or below to see how that changes what your images are communicating.
7. Backlit product photography.
Backlit product photography is one of the most popular types of product photography. And it’s not hard to see why. Backlit products look stunning and are often used in catalogs, and catalogs have a very specific purpose: to sell. Bear in mind that that you will want to be careful about how you backlight your subject so you have enough light and detail on the actual product.
8. Umbrella light photography.
When you’re using umbrellas you have a few different options for lighting your subject. There are reflective umbrellas, that tend to create a more contrasty light, or shoot-through umbrellas that diffuse the light giving you a soft natural look. With a shoot-through umbrella you’re getting a soft light source that nearly replicates the natural light found outside. Umbrellas are recommended for beginners just getting into product photography because they’re affordable, portable, and do a great job.
Studio product photography setups.
There are a couple of different studio product photography setups that people and companies use for their shots.
High-end studio setup.
The high-end studio setup is a professional studio where the photographer has a studio and takes pictures of products without having to worry about lighting and other issues.
This type of product photography setup can include lots of natural light and/or artificial light depending on the space. With a high-end studio setup, there is more money involved, and that means photographers can tailor photos to look exactly how the client wants.
In a high-end studio, the photographer is usually well-established and might even have a team of assistants who help them set up their studio and get everything ready before the clients arrive. There will typically be a selection of strobe kits, seamless backgrounds, styling props, and anything else you would need for a full studio production.
Two-light product photography setup.
This is probably the most typical studio lighting configuration, and it works well because it provides you with a lot of versatility in terms of the kind of light you use, where the light comes from, and how much light you require.
With this setup, you place a light on both sides of the subject. To add extra emphasis to the product, you can also shine a light directly above it or reflect it off a surface. This type of product photography setup is ideal for smaller spaces.
If you’re just starting out, a two-light product photography setup is a cost-effective way to get your break in the industry.
Settings for product photography.
Aperture, shutter speed, and ISO are important settings for product photography, and each has its role in how shots will look.
ISO.
ISO settings are used to adjust how sensitive your camera’s sensor is to light. The lower your ISO, the less sensitive it will be, and vice versa. The most common ISO for product photography is 100 or 200, but if you want to take a photo in a darker environment, you may want to use a higher ISO (like 400 or 800).
If you want to avoid the grainy noisy look of images taken at a high ISO it’s best not to go above 800 as your images could start to show some noise and artifacts. It’s best to experiment with different ISO settings and see what works best for each situation and product. The threshold for how usable your images are at a certain ISO setting will vary from camera to camera. Test out the limit of your gear so you know how far you can push things while on set.
Shutter speed.
Shutter speed refers to how long your camera’s shutter remains open, allowing light into your lens. When shooting products, the best shutter speed for product photography will generally be a fast shutter speed. The faster the shutter speed the less risk of blur, camera shake, or ghosting.
For example, if you are photographing jewelry or other small products with intricate details, try using an aperture setting between f8 and f16 and then choose a shutter speed between 1/100th and 1/250th of a second (or higher if not using a tripod.)
Aperture.
The aperture for product photography controls how much light can enter your lens. Adjusting it allows you to control the depth of field (how blurry or sharp an image appears in front of and behind your product). In general, product photography requires a shallow depth of field so that all attention is focused on your product.
This can be accomplished by setting a large aperture value like f/4.5, which will make everything else appear blurry when taking pictures of products.
However, a small aperture value like f/16 will produce a very wide depth of field that makes it difficult to focus on a particular. Sometimes, however, the entire product or scene needs to be in focus so using this setting is appropriate – capturing products with crisp clarity and definition.
Must-have product photography props.
It is helpful to have a large selection of unique and attractive props at your disposal with product photography. This will allow you to create shots that are more interesting than just shooting the same product on a plain background.
Here are some helpful product photography props, depending on the type of product photography you shoot most:
- Wooden chest.
- Furniture tray.
- Desk with plants or flowers.
- Dresser with attached mirror.
- Coffee table with flowers.
- A glass of champagne.
- A bottle of wine.
- A can of soda (or a bottle.)
- A bowl filled with fruit or vegetables.
- White background.
- Magazines or books.
- Granite, slate, or polished cement surface slab (or vinyl replica.)
- Notebooks and pens.
- Perfume or cologne.
- Electronics (laptops, phones.)
- Mirrors.
- Silk or velvet ribbon.
- Stones or minerals.
- Plants, flowers or dried foliage.
- A selection of fabrics.
Product photography trends.
Product photography is as much art as it is science. Different products present different challenges, so it’s challenging to talk about product photography trends in general terms.
However, there are a few product photography trends that seem to be popping up more lately.
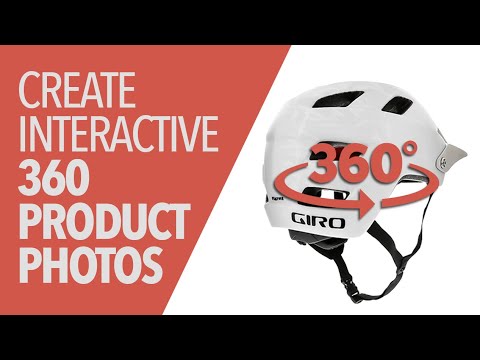
1. 360-degree product photography.
360-degree product photography is becoming a trend as of late. The benefits of 360-degree product photography are many. It’s an effective way to showcase your products uniquely. It can also help you increase sales by making your products stand out from the crowd.

2. Artificial lighting.
This is more of an ongoing trend and involves using artificial lighting equipment when taking product photos. This might seem like overkill if you’re just starting with product photography, but if you plan on doing it professionally (or semi-professionally), it’s best to start off right from day one.

3. Minimalism.
One noticeable trend is toward minimalism when it comes to backgrounds and product displays; simple white spaces tend to be favored over busy, colorful backdrops (though there are always exceptions). Many products are shot on white backgrounds these days, and it’s understandable because these backgrounds help products stand out more.

4. Drones.
More and more product photographers are using drones to capture their photos. This is a bold, yet smart move because drones give you full control of what angle to take your photo at. While it may require a bit more setup to get the right shot, it’s very useful.

5. Using shadows.
Another common trend in product photography is how people are using shadows on their products to give them depth and realism. You can achieve this effect by placing your subject against a darker background or even by placing them against a white wall or piece of furniture where they’ll be easy to see against the backdrop.

6. Lifestyle elements.
Many consumers want brands that appeal to them personally, so don’t forget about engagement with your audience. To do this, consider adding lifestyle elements like food styling or location photos in your shots to show off how much thought goes into creating these images. Customers who can see themselves reflected in the product images they’re seeing will be more likely to turn into paying customers.
Build an online portfolio website you love.
Put your product photography in the spotlight.